Showing posts with label knitting. Show all posts

Tuesday, August 17, 2010

Finally! Forest Cardi Pattern is Completed! :D


Wow, it feels like forever since I started re-editing it. There has been so many interferences and delays. My husband even tease me saying that that pattern was like a never-ending story.
BUT!! through it all, it's finally done and released on Ravelry!.

Through this editing process, I thought myself Adobe InDesign program and it was worth investing the time. The pattern edited with InDesign looks so much more professional, and the printed charts are so much clearer.


Friday, March 12, 2010

Honey honey~


Yeah! My newest pattern is now out there! (Actually, released last Wednesday)


Ah, I wanted publish this last Dec, but it was delayed so long because of moving and repeated frogging!
Because it is a simple style, the silhouette and the right fit was very important to make it flattering on a female body, but finding the right fit required so many frogging and re-knitting. I sewed hook&I tapes along the front opening, so that I can either close or open as much as I want.
Because the honeycomb stitch creates a thick fabric, it's really warm and comfortable to wear it now.

I used 9 skeins of Knitpicks Cadena that I had in my stash and am happy about the result!
The pattern is on my Etsy shop (stitchlogue.etsy.com) or Ravelry (http://www.ravelry.com/patterns/library/brioche-honeycomb-jacket).


Friday, January 01, 2010

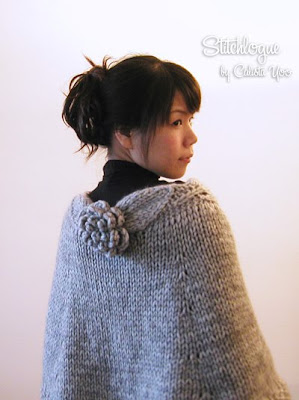
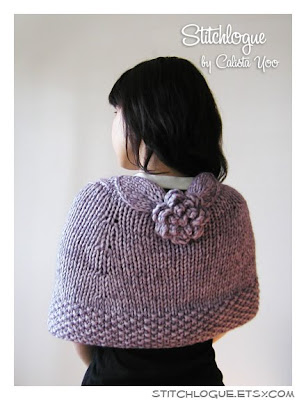
Bulky Rose Capes

Happy New Year everybody!

Last December was a really busy month for me, not because of fun parties and celerbrations, but because we had to do an unplanned moving. After that I caught a cold and sick for a while.

I've finished these capes early December but haven't had a time to post it here.
I knitted them with Rowan Big Wool Fusions which have been in my stash for a while.
There are 3 design options for this cape - long / short / long with arm slits.
They are such quick projects and I've been enjoying the compliments wherever I wear them. :D
The sad thing is, nowadays the weather in NY area has been too cold to wear these capes alone.
I'm selling the pattern on my etsy store (http://stitchlogue.etsy.com) and also on my Ravelry page.


Saturday, November 14, 2009

Enchanted Forest

Update on Feb. 8 2010 - This pattern will be available for online purchase in early March 2010. The pattern will be revised for better fitting, various collar options, and better grading. Also it will be re-edited for easier understanding.
If you want to get notified when it’s available, please send me a message or leave under the comment section. Thank you!

--------------------------------------------------------------------------------------------

It's been a while since I posted anything here.
I've been quite busy starting up a store on Etsy (stitchlogue.etsy.com), and this Forest cardi is the first sample for the store. (also for myself)

I edited the pattern here and there for a better fit and better finishing.
Also this time, I made the collar detachable, and added a sting with pompoms at the end.

The bulkiness makes it very warm even though it’s a cropped cardigan with short sleeves. If I make matching arm warmers, it will be good to go until very late November. :D

Since the yarn is very elastic, I used 8 and 9mm needles this time to make it tighter. I’m very satisfied with the result.


Saturday, October 17, 2009

Vogue Knitting Lace Shrug

A couple of my friends got married last summer in Korea, and had a wedding reception for the friends and guests who couldn't be there for their wedding after returning to New Jersey.
It was held in this beautiful place called Tide Estate. I loved the building , especially the chandeliers.

It was late September, so I needed something to cover my cold shoulders and arms when I wore a halter neck dress.


I heard initially this pattern had serious errata, but now everything is rewritten and corrected.
I started knitting this 5 days before the reception date, and was able to finish it on time. I only knitted it after work in the evening and it’s such a quick knit with a satisfying result.

Refering other knitters' notes on Ravelry, I used size 9 & 10 needles, and added 2 more repeats to make the sleeves longer.


Somehow the back part turn out to be a little bit loose...


Also I knitted 11 rows for the trims to make the collar stand higher and cover the armpits better, and I like how it turned out.


Thursday, October 08, 2009

Leafy Cardi (a.k.a. Forest Cardi)

This design was my first magazine published pattern and I’m very disappointed at the editing of Yarn Forward magazine.

I initially made this pattern in a big chart format. If they had asked me to edit it into a pattern with stitch by stitch instructions to fit their format, I could have done it. However, I was very busy at that time, and YF said their tech editors could change the format, so I sent the pattern as it was. It was last February, and YF took 5 months to grade and edit the pattern.

Even after taking that long, there were so many editing mistakes. I understand editing somebody else's pattern is not easy. However, most of the errata are very basic errors, which could have been found if anybody proof read once.
They even put a completely wrong chart for the collar part.
I reported this issue to YF on Oct. 2, and I only got an answer that the tech editor is on vacation for 2 weeks, and the correct chart is not even on the errata page yet.
Until they post it on their errata page, I’ll leave the correct collar chart on my flickr.
If you are making it, please click this link and download the correct collar chart.

I give standing ovation to Carli, who found most of the errata and managed to make an FO with that pattern! If anyone is making this, please read Carli’s note at “http://www.ravelry.com/projects/btrflyundone/leafy-cardi

I can’t wait to have the copyright back in 4 and half months, and rewrite the whole thing and publish the pattern myself…
I'm thinking about adding variations on collar part when I sell the pattern.


Monday, July 13, 2009

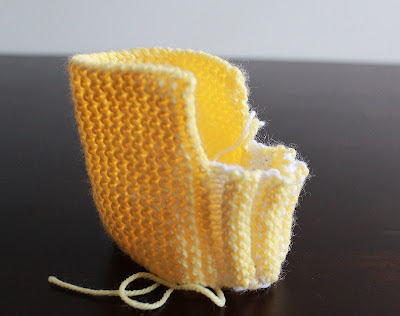
My version of Babystøvler


I made these shoes as my friend's baby shower gift based on the pictures of FO's and the progress shots on Ravelry, since I couldn't get the original pattern anywhere.

After finishing this project, I found that I made a little less numbers of ridges at the toe than the original, but I like it as is.

Download the pattern in PDF format

Here is how I made my version of Babystøvler;

  • Yarn: DK / 8 ply weight yarn in 2 different colors
  • Needle: US5/ 3.75mm or size to get the gauge
  • Gauge: 6sts x 12rows (1”sq) in garter st
  • Finished size: New born size / 3.5 inches measured at seam of the sole
Instructions
With main color, CO21sts.

Work 26 rows in garter st.

1st decrease row: k1, ssk, k to the end of the row
2nd decrease row: k to last 3 sts, k2tog, k1.
Rep the two dec rows once more, and 1st dec row one more time. (16sts left)

1st increase row: k to last 1 st, m1, k1.
2nd increase row: k1, m1, k to the end of the row
Rep the two inc rows once more, and 1st inc row one more time. (21sts left)

Work 25 rows in garter st.

Next row: BO 9sts, k to the end of the row.

TOE SECTION
With contrasting color, work 4 rows in st st.
With main color, work 4 rows in rev st st.
Rep these 8 rows 3 more times, and work the 4 rows of st st in contrasting colors once more.

This is how it should look like from the wrong side when it's done knitting.

Fold it where the lines are drawn.

Graft stitches on the needle and the cast-on edge using kitchener stitch technique.

Then you will have something like this.

Sew the top edge of toe part using running stitch.

Pull the stitch tight to gather the top edge.

Sew the bottom edge of the toe part same way.

Graft the bottom edge of the bootie. Sew half stitch from each side to make the seam allowance as narrow as possible.

Sew couple of stitches at the bottom of the opening to make the ankle part stand up better.

Now you are done! :) Repeat the other side and admire the cuteness!


* Please use this pattern for personal / non-profit use only. You may use this pattern for charity knitting or to make projects for charity fundraising. Please do not post this pattern anywhere else without permission. Thanks.* 

Barely a Clapotis!


  • Needle: US 8 / 5.0 mm
  • Yarn: Reynolds Soft Sea Wool 3 skeins (486.0 yds)

I started this with only 3 skeins of Reynold’s Soft Sea Wool I had in my stash. I did some research and found handy 1/5 rules of Clapotis. I blindly followed and the rule, thinking I would have a clap-o-scarf(I made up that name :P).

By the time I finished knitting 2 skeins, I realized that my clapotis wouldl be too short! I didn’t think it through that the original clapotis was a SHAWL, which meant the ratio of the width to the length would be bigger than a scarf! :(

Since I overdyed light blue yarn into lavender with KoolAid, there was no way I could get more of the same colored yarn! I considered many different options to solve the issue, such as buying more Soft Sea Wool in a different color and connecting by alternating the two colors as if I intentionally put stripes. However, another problem I ran into was that I couldn’t easily find more of Soft Sea Wool in the LYS close to my office or home (I bought them at The Yarn Connection right before they closed the store.)
Totally frogging and starting it over with a different yarn was not an option for me. Though I love wearing simple designs, I hate knitting one. It’s unbearable to me! Still I wanted to have a clapotis so bad!

So I kept on knitting, hoping that wet blocking will make it a little bit longer…and it worked like a magic! Even though it’s a little bit shorter that I initially hoped for, it’s still a wearable clapotis!
I’m so glad to be a proud owner of a clapotis! :D

The mods that I did other than making it smaller were purling sts that would be dropped instead of using stitch markers, and purling the sts tbl on the WS if it was k tbl on the RS.